Last Updated on August 31, 2023 by David
How to engage and wow customers using Reamaze!
Every once in a while we like to show off the amazing flexibility and deep integration capabilities of Reamaze with many of our partners. Today, we’re going to show you a few ways you can deeply integrate customer data with customer conversations using our BigCommerce integration.
Reamaze’s deep customer integration will allow you to:
- Enable customers to engage with you whenever they need assistance as they’re browsing your store through real time messaging or live chat
- Instantly access customer order information from BigCommerce
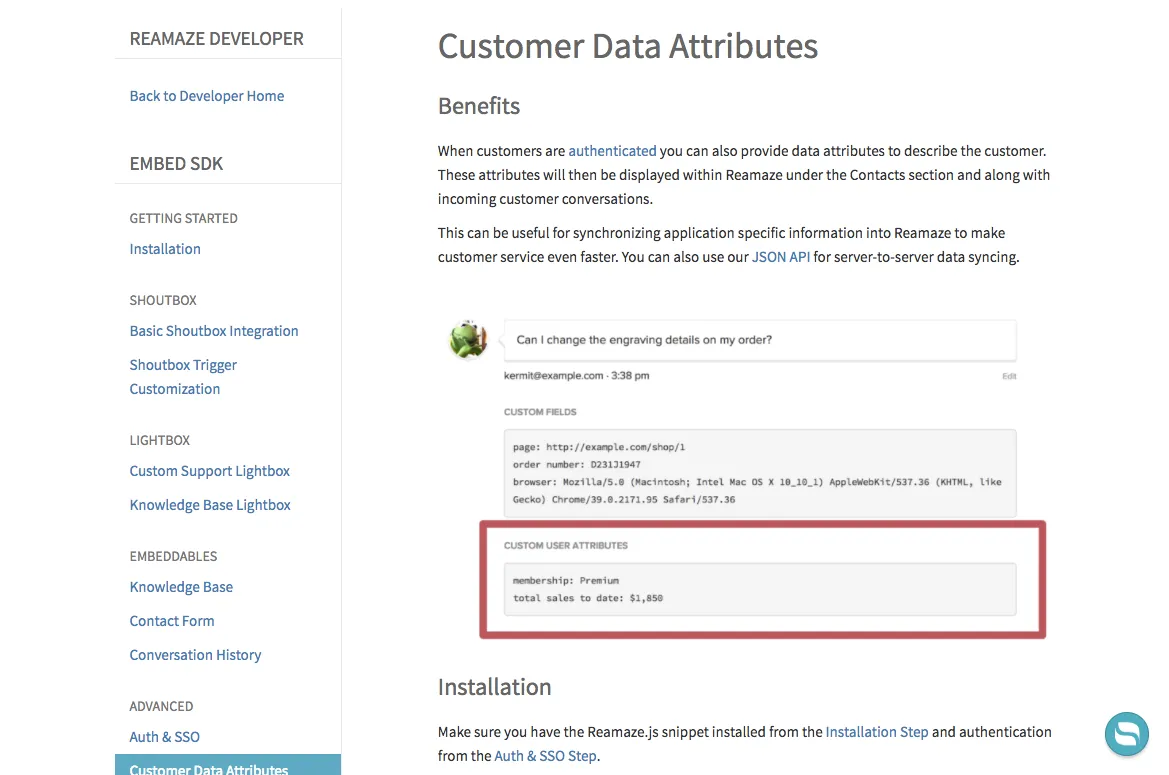
- Add crucial customer data through custom attributes either manually or programmatically with the Reamaze API and display the data for your customer service agents
- Automate your customer service team using workflows based on custom attributes or form fields.
Getting Started
You’ll obviously need a BigCommerce account to get going. If you’re already a store owner on the BigCommerce platform, you’re already good to go!
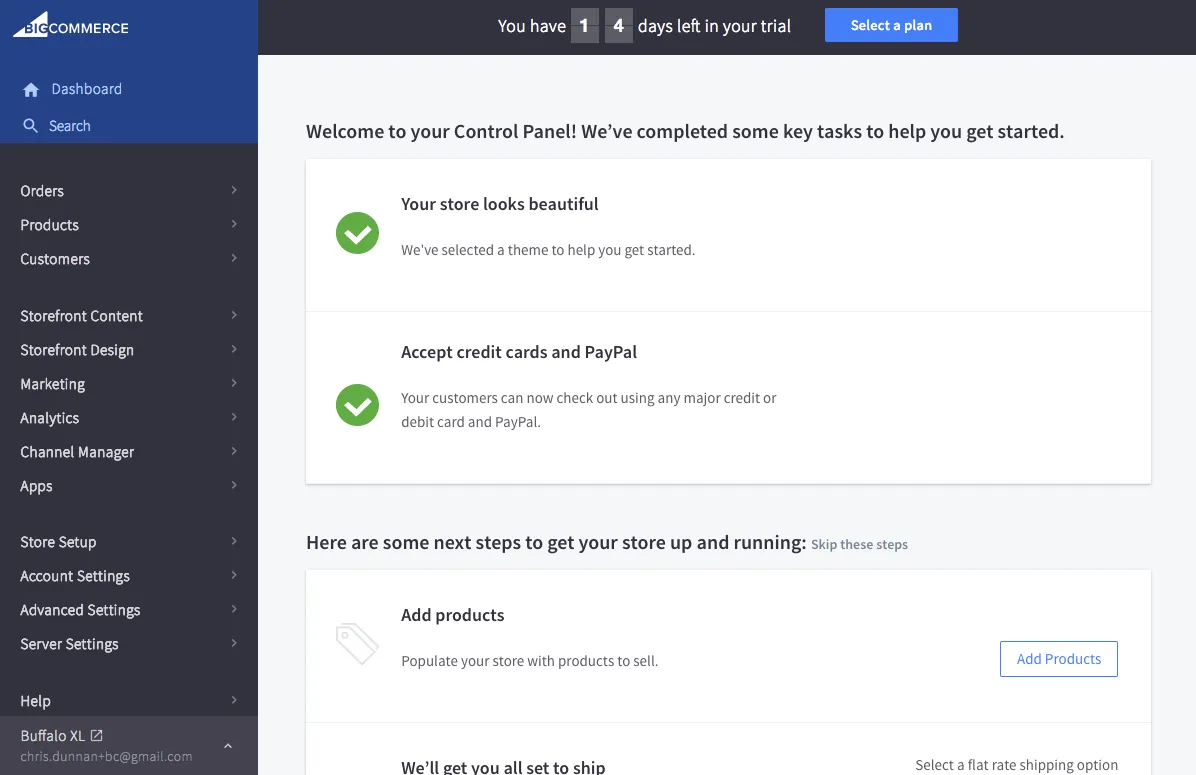
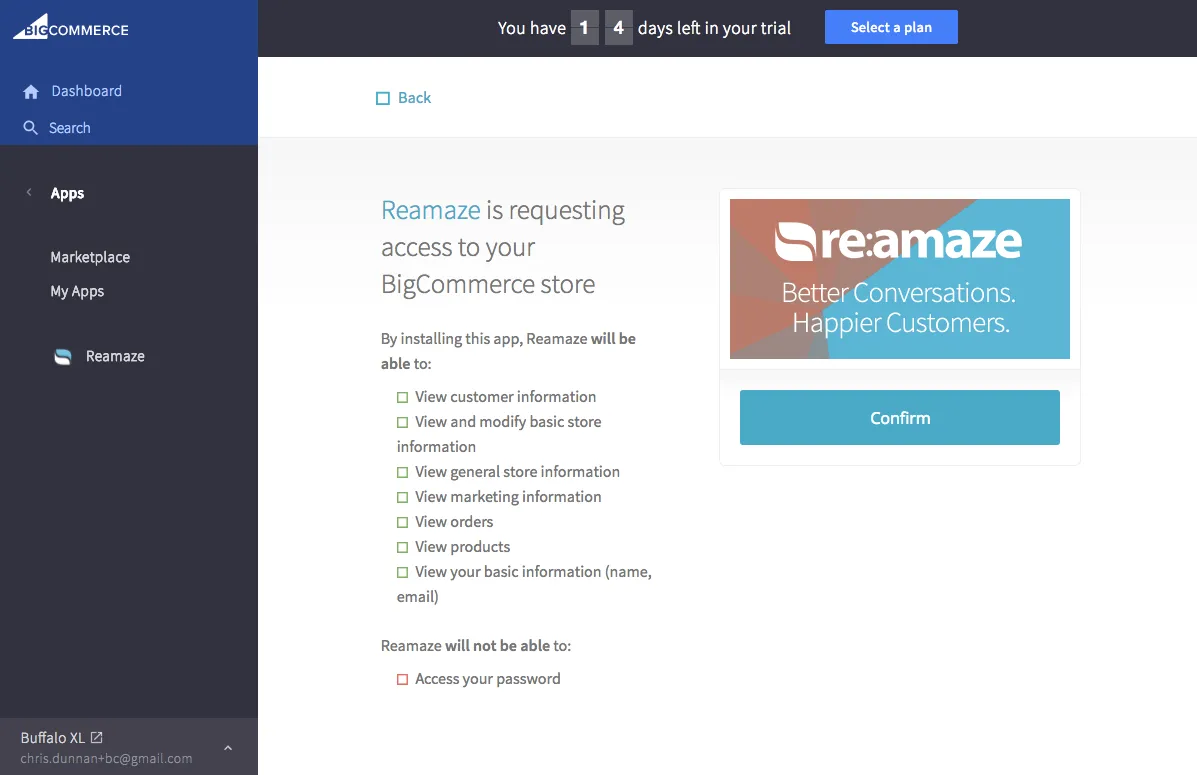
Head on over to the “Apps” section and click on “Marketplace”. Look for the Reamaze app and “Confirm” to install the app to your BigCommerce dashboard.
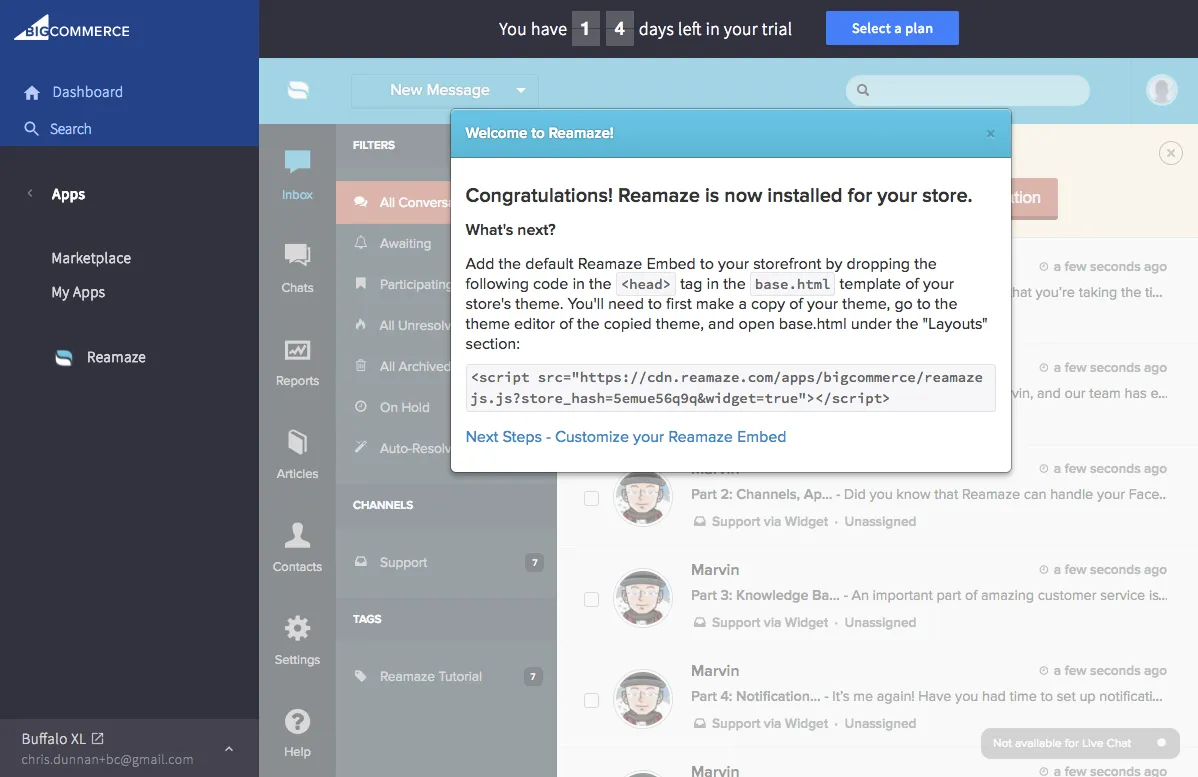
If you already have a Reamaze account, go ahead and log in directly. If not, Reamaze will help create one for you based on your BigCommerce credentials. The first screen you’ll see after logging in will be some simple instructions to get the default Reamaze Shoutbox embedded onto your store.
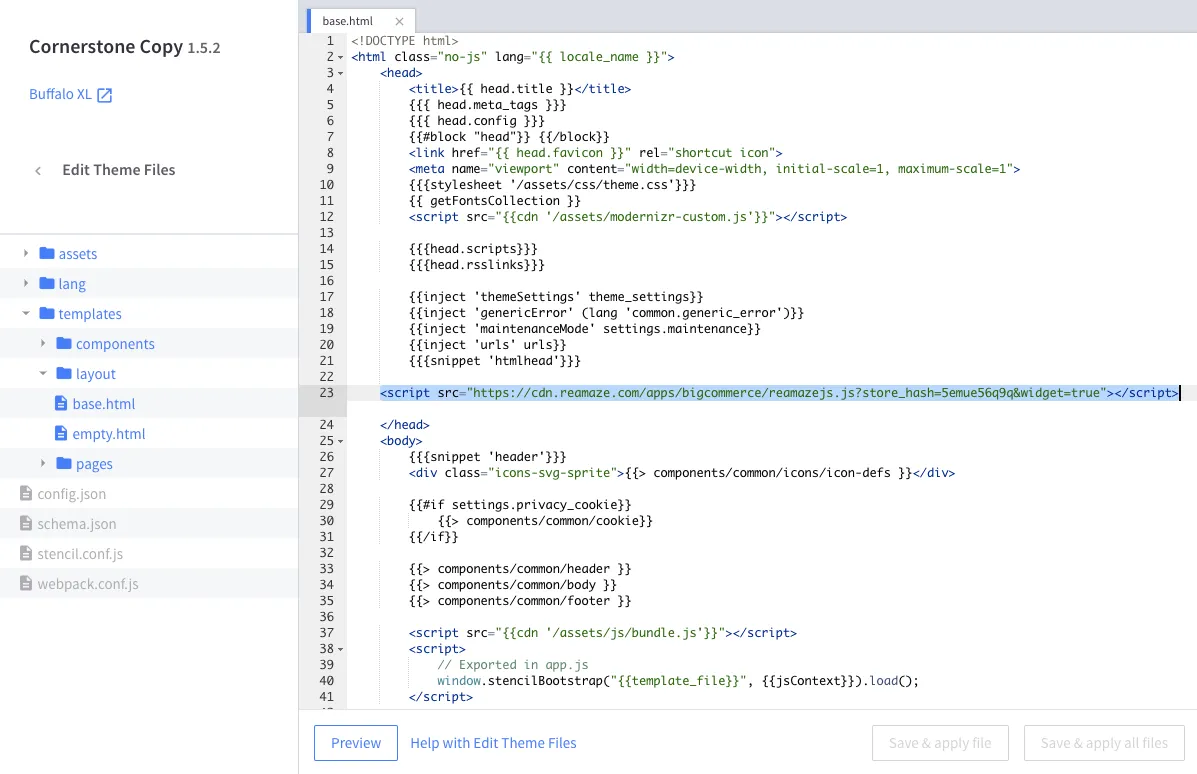
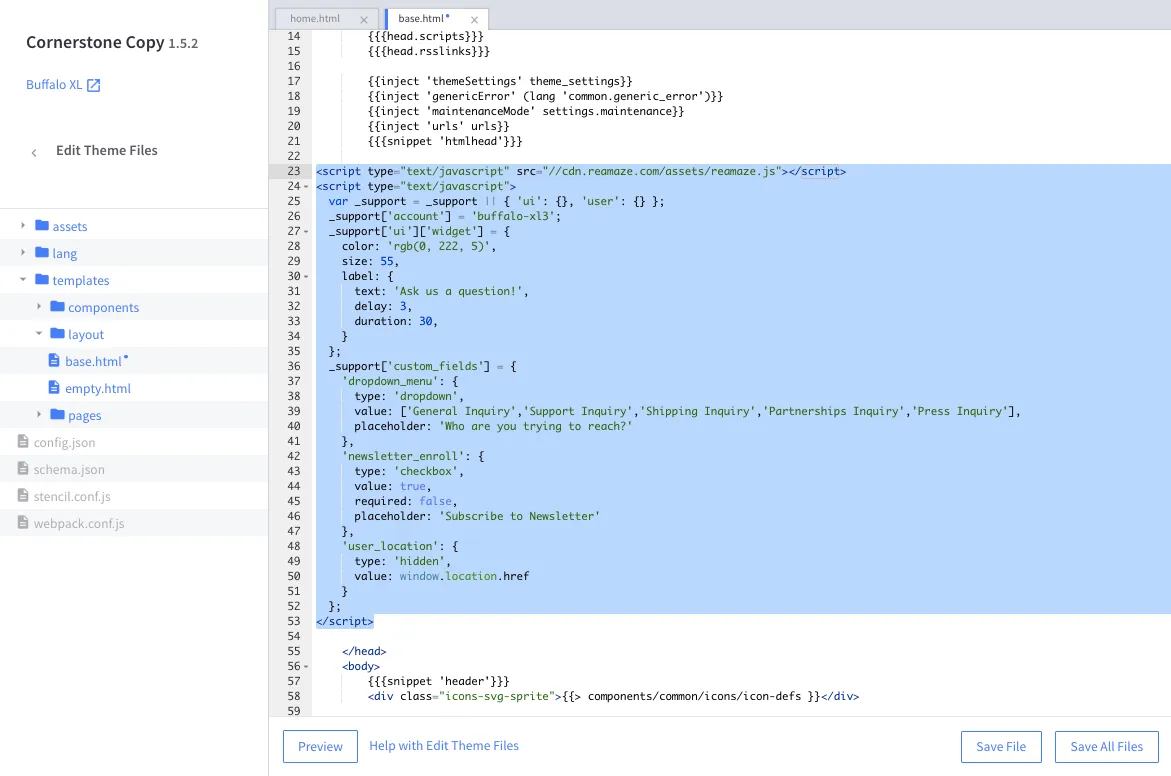
Follow our instructions here on how to edit your BigCommerce theme files. You’ll need to access the base.html file for Stencil templates by making a copy of the theme you’d like to use.
Once you have access to base.html, you’ll want to paste the code provided to you in the step above above the </head> tag. See the highlighted section below for reference.
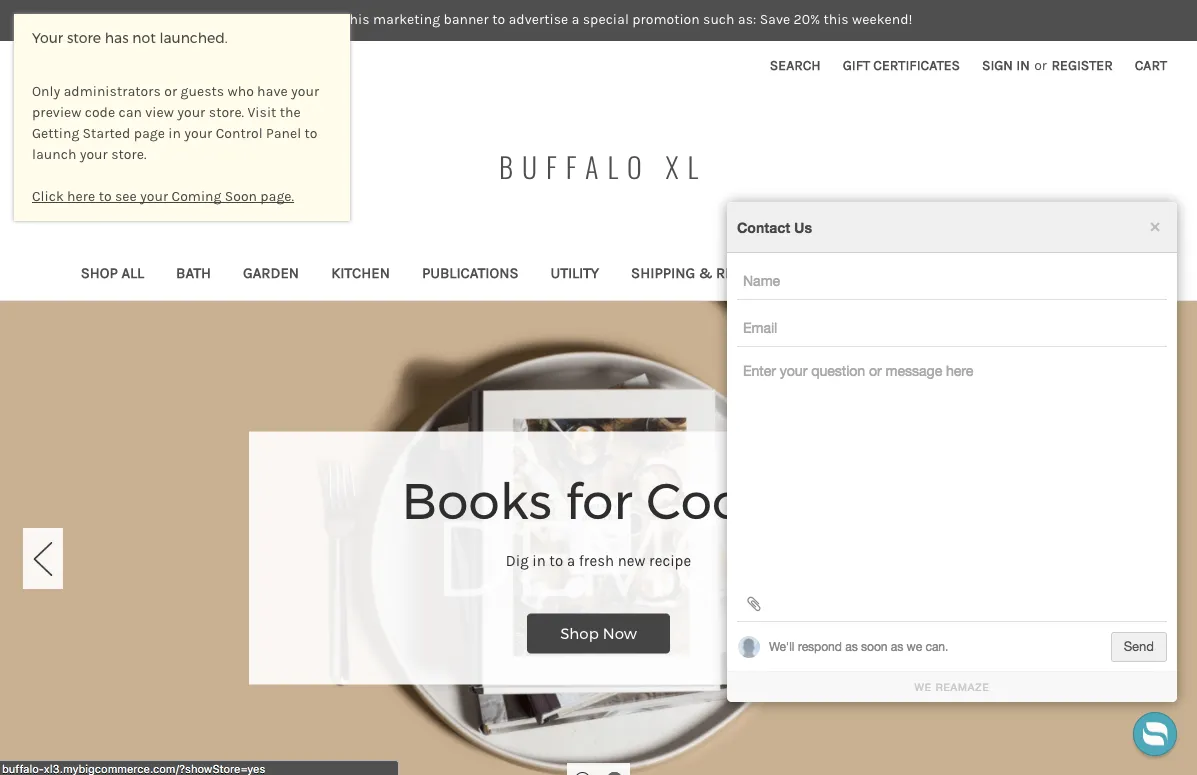
After you’ve saved the changes, go ahead and apply the template for your store and take a sneak peak. You should see the default Reamaze Shoutbox now installed on your store front. The Shoutbox follows the customer as they’re browsing your store and offers them easy access to help when they need it.
Getting Setup
We’ll skip ahead a few step at this point and customize the Reamaze Shoutbox some more. You can watch a video tutorial on how to do that here and here. What we did was the following:
- We changed the color, size, and welcome prompt of the Shoutbox trigger icon
- We changed the color of the Shoutbox itself by going to the brand customization section in Reamaze
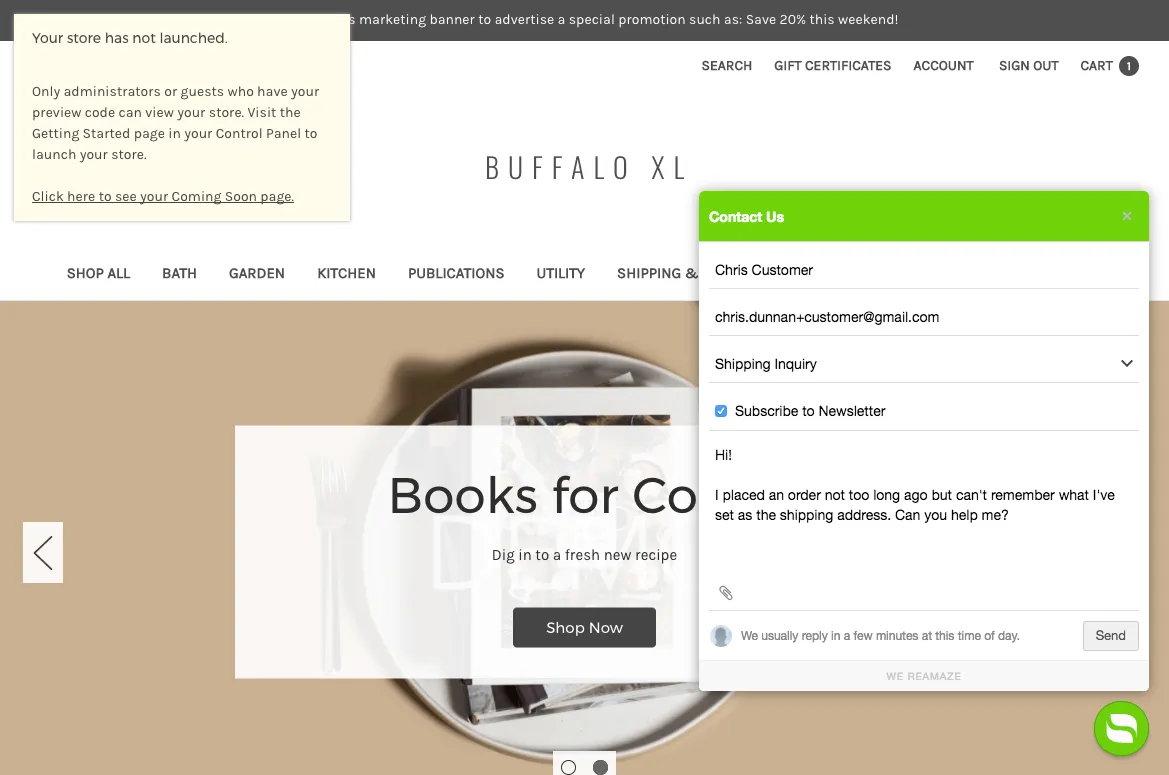
- We added several custom form fields to collect more information from the customer. A dropdown menu will ask the customer which department they’d like to reach. A checkbox will ask if the customer would like to be subscribed to the newsletter. A hidden field will track where the customer was when he/she decided to reach out. We’ll show you how these fields come into play later on.
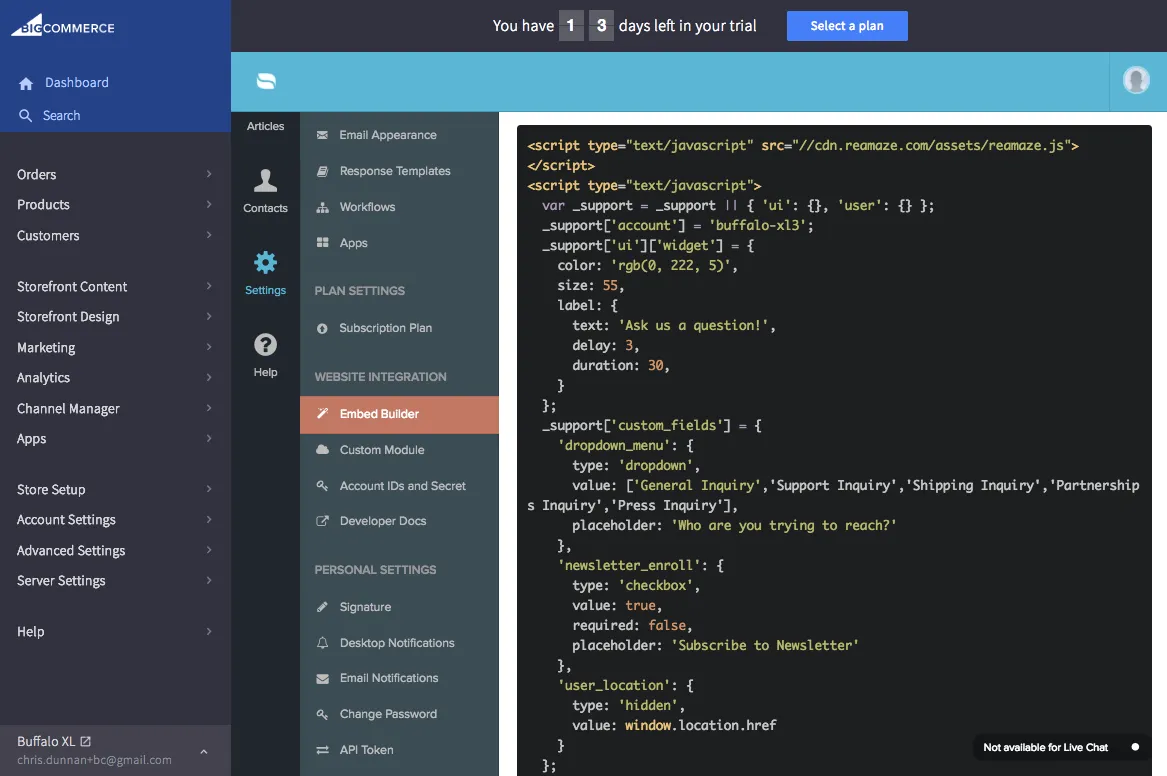
Once you’ve copied the new Shoutbox JavaScript code displayed above, you’ll want to repeat the previous steps and replace the code above the </head> tag. See the highlighted section below for reference. Remember, you’ll need to edit the template copy’s base.html file.
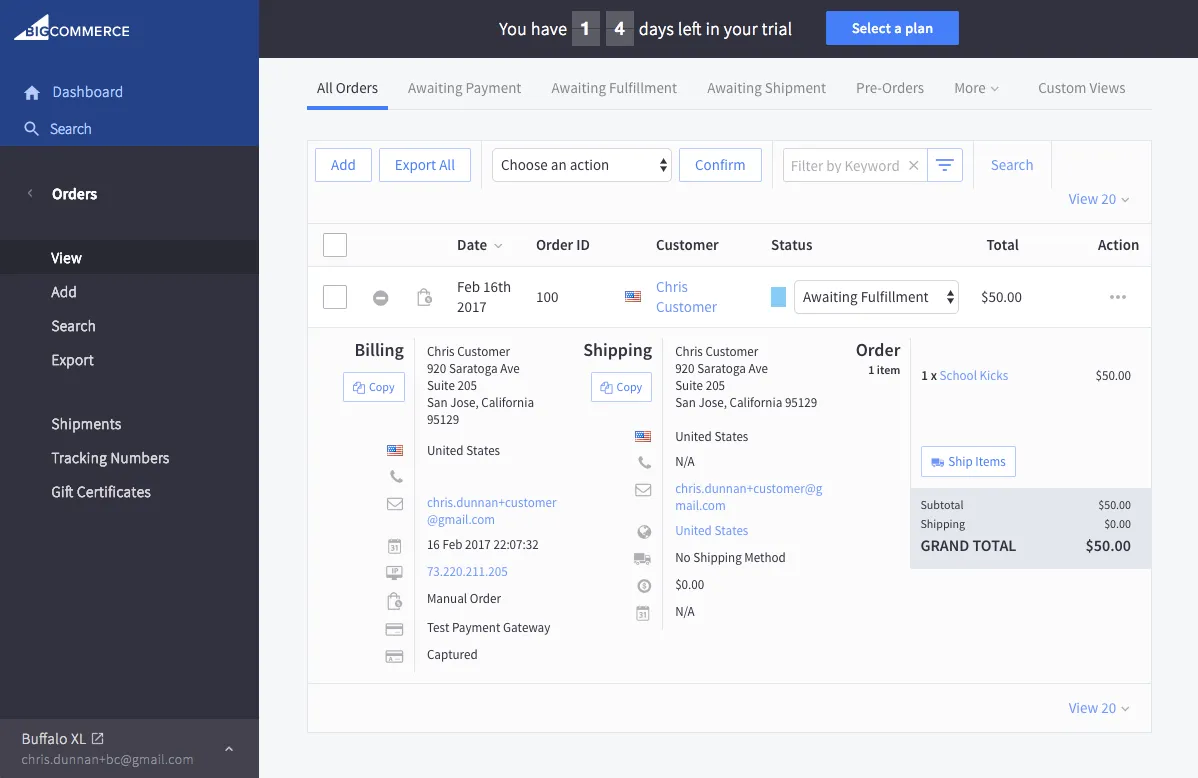
You’re almost ready to start testing! Before you do, let’s make sure you have a record of a customer and a purchase under his/her name. You can create a test order for a test customer. BigCommerce has a few tutorials on this here and here.
We’ve created a manual order for a new customer named Chris Customer. He ordered an item called “School Kicks” at $50. We also see his name, email, address, order ID, payment information, and shipping information.
To start testing, go ahead and preview your store site with the new Shoutbox deployed. If done correctly, you’ll see the new trigger, Shoutbox, and custom form fields.
We then pretend to be Chris and initiate a customer service request through the Shoutbox. This step is crucial because you need to make sure that the name and email of the customer matches the manual order you created within BigCommerce. The data is synced using these two fields so make sure to double check!
When ready, feel free to submit the inquiry as the customer.
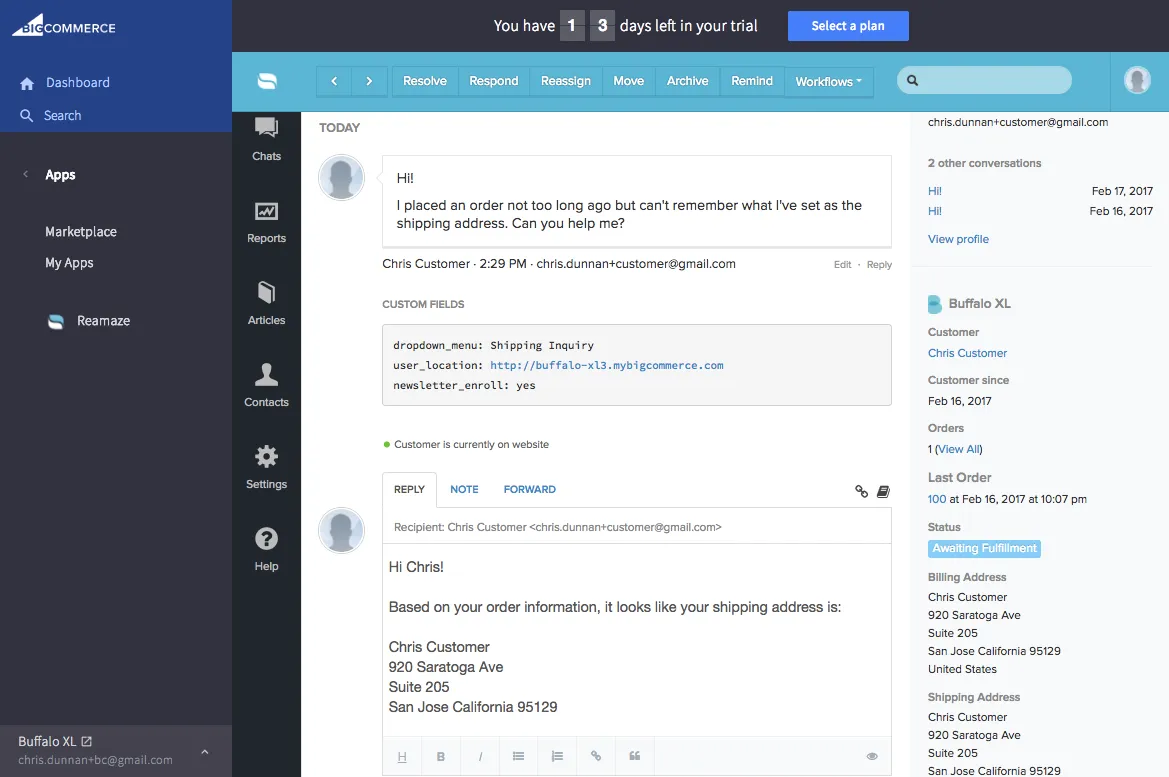
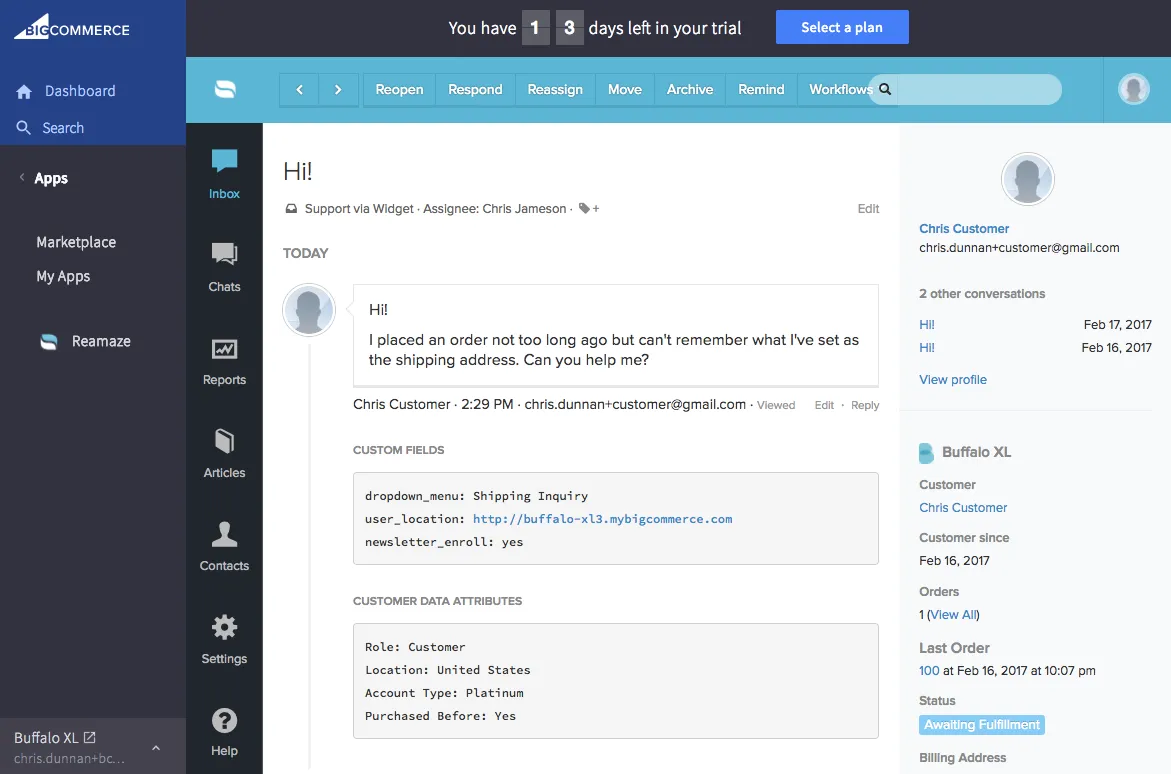
When you receive Chris’ real time message as the customer service agent on the BigCommerce dashboard, you can instantly access Chris’ most relevant information:
- Order information, past order information, billing, and shipping information on the right hand side
- Custom field selections in the first gray box
- An indicator that the customer is currently online
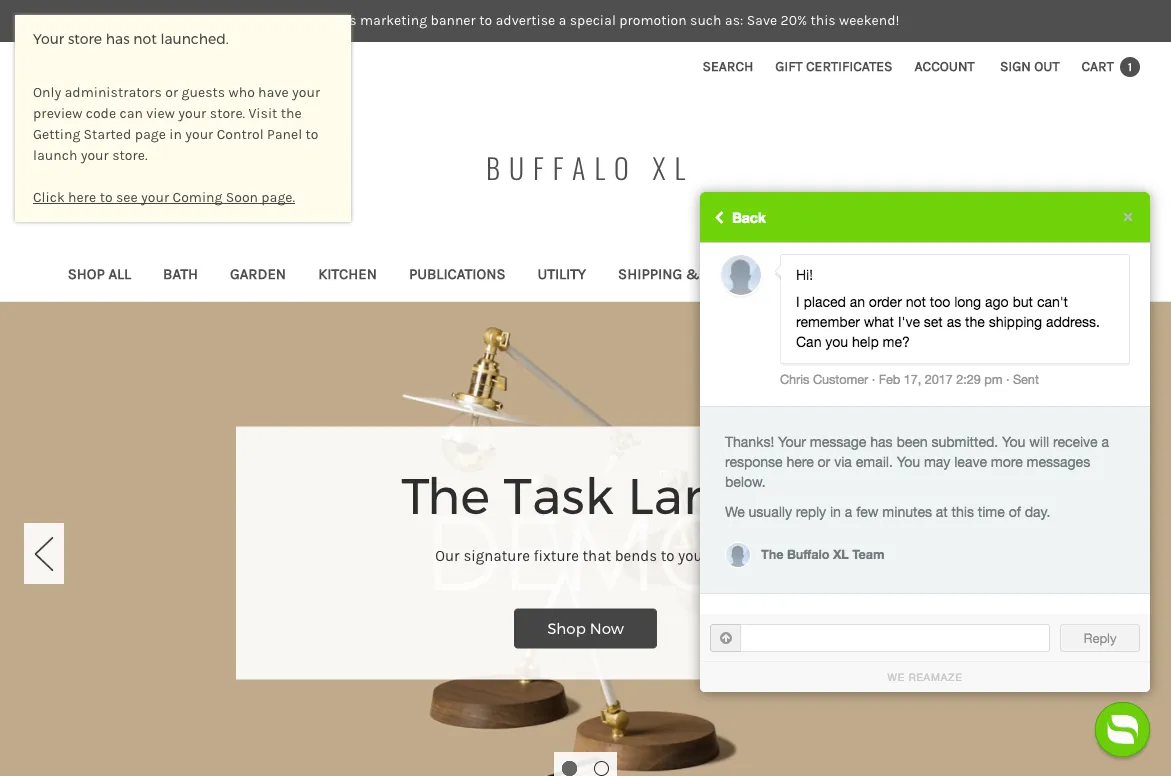
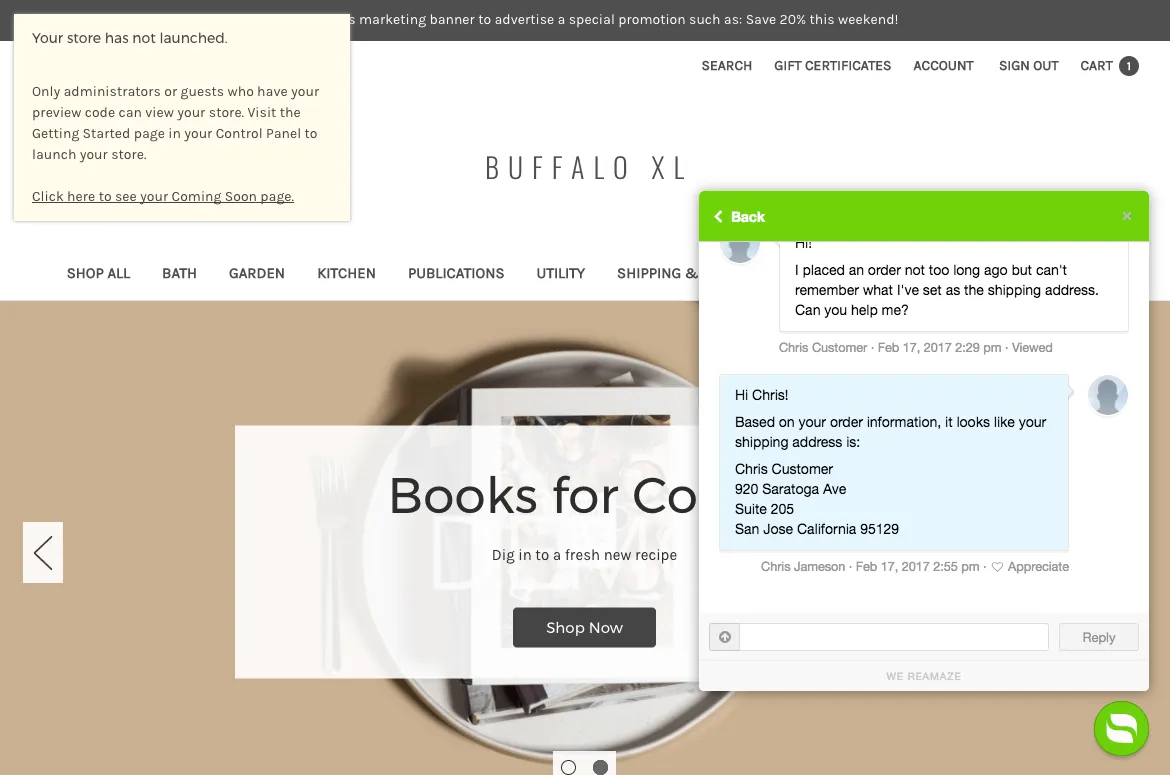
When you compose a reply back to Chris as the agent, Chris will instantly get a web push notification right on your store! Any subsequent messages sent back and forth will be in real time, right on the website. If Chris goes offline for any reason, your agent replies will be sent to Chris via his email address.

Automation
Workflow automation is one of Reamaze’s most powerful features and can be designed to work within the confines of your business processes. Reamaze triggers are designed to cover a wide variety of use cases so we highly recommend checking out the options and paying attention to and/or relationships. If you can identify key patterns (aka TRIGGERS) in conversations with customers, you can create a workflow to command Reamaze to automatically do certain things (aka COMMANDS).
In the example below, we’ll be creating an automated workflow to TRIGGER:
- WHEN the customer selects the “Shipping Inquiry” option from the Shoutbox dropdown menu AND
- WHEN the incoming message channel is “Support”
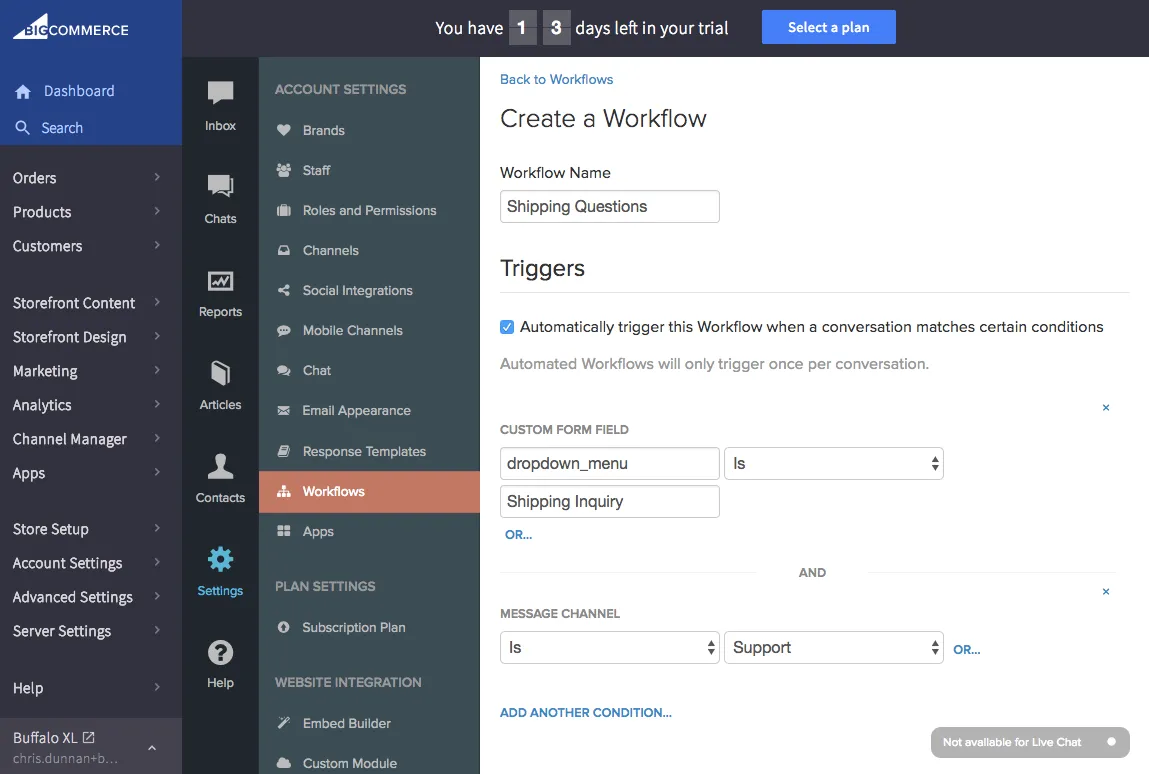
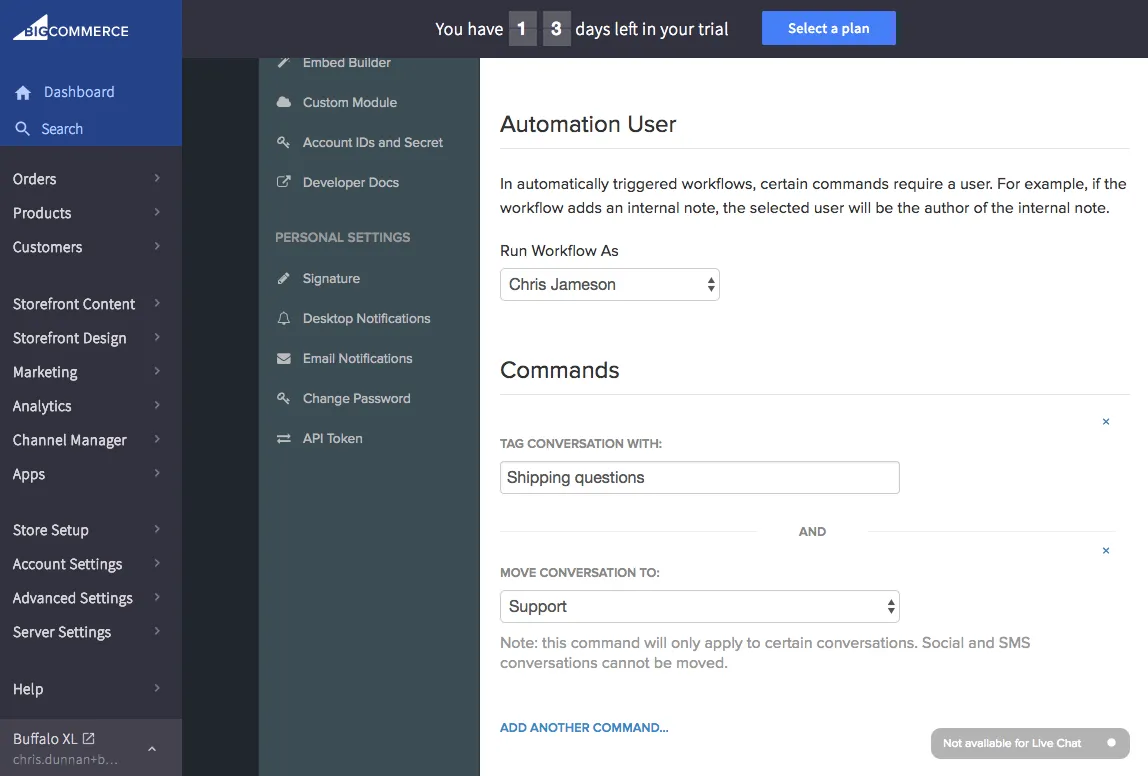
The COMMANDS we’ll be using for this example will be to:
- Tag the conversation with “Shipping questions” AND
- Move the conversation to the “Support” channel.
As you can see, the possibilities are endless with Reamaze Workflows. The key is to utilize available data from your Shoutbox custom form fields in conjunction with other conversation attributes to design a logic for automation.
Customer Attributes
In addition to creating workflows from custom form fields (related to conversations), Reamaze can go one step further and help you with create workflows from customer attributes (related to customers).
Customer attributes are displayed beneath the first gray box within any given conversation and adds additional context for any customer service agent working to help the customer. The main difference between custom form fields and customer data attributes is that custom form fields can change per conversation depending on what the customer has selected. Customer data attributes are key data points that belong to a customer’s profile.
You can add customer data attributes to customer profiles in one of two ways:
- Manually by entering key-value pairs under “Data Attributes”
- Programmatically via our API or Reamaze.js to append key-value pairs for customer data attributes.
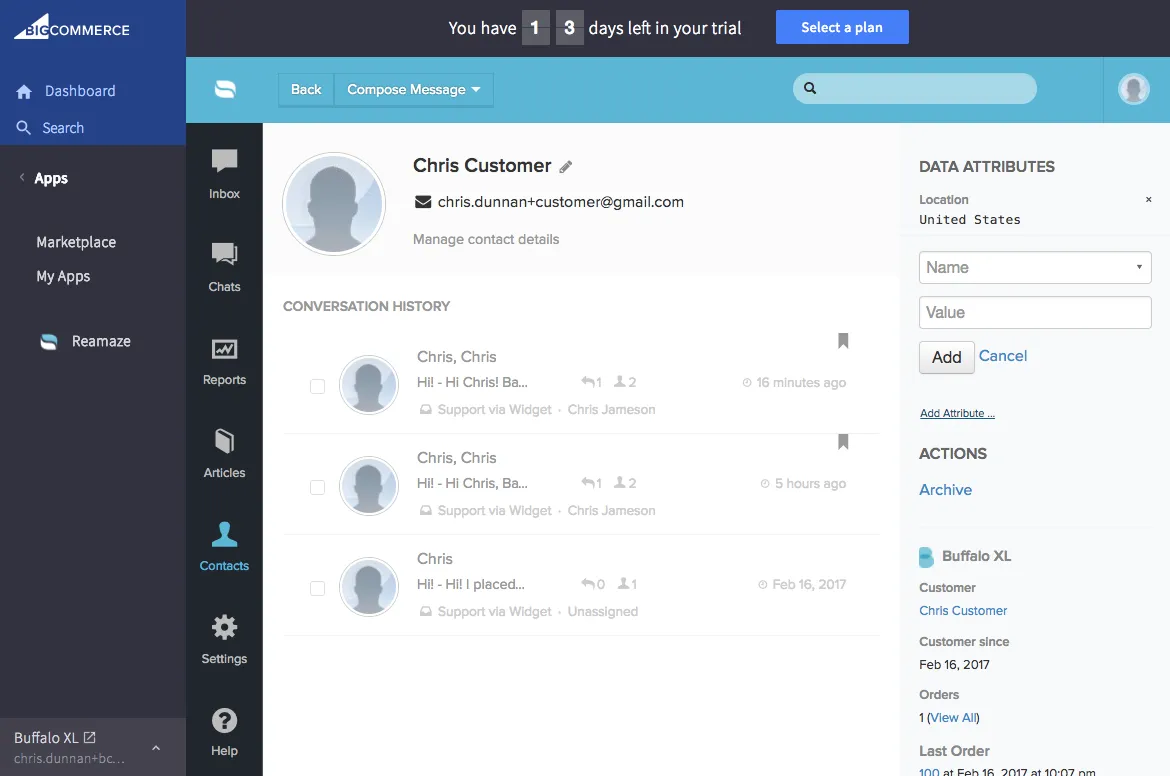
Here we’ve entered 4 attributes for Chris Customer.
- Key = Role; Value = Customer
- Key = Location; Value = United States
- Key = Account Type; Value = Platinum
- Key = Purchased Before; Value = Yes
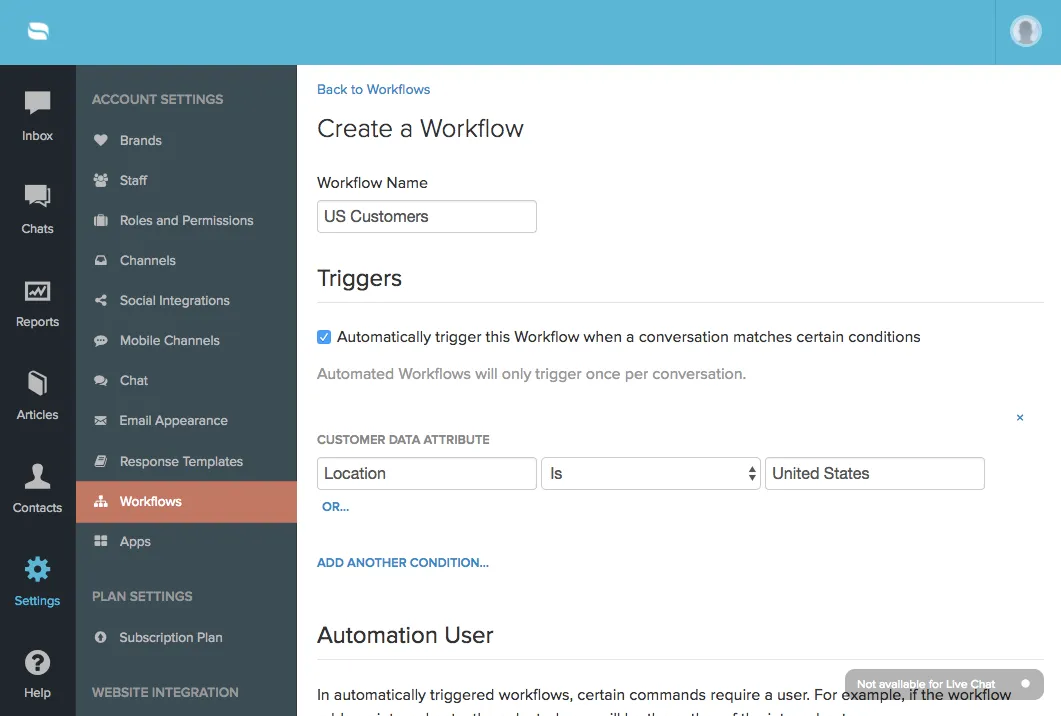
Just like how workflows can be triggered based on custom form field selections, they can also be triggered based on customer data attributes. In the example below, we’ve created a trigger for WHEN the customer location is “United States”.
All Together Now
The combined integration of customer order information from BigCommerce + customer engagement through the Reamaze Shoutbox + customer data attributes + workflow automation is a powerful data system for any business.
Interested in what else we have to say? Make sure to recommend this article by clicking the heart and follow us for more stories about startup life, customer service, and tips on treating customers right.
You can also find our multi-brand, multi-channel customer service platform at https://www.reamaze.com. Follow @reamaze.